
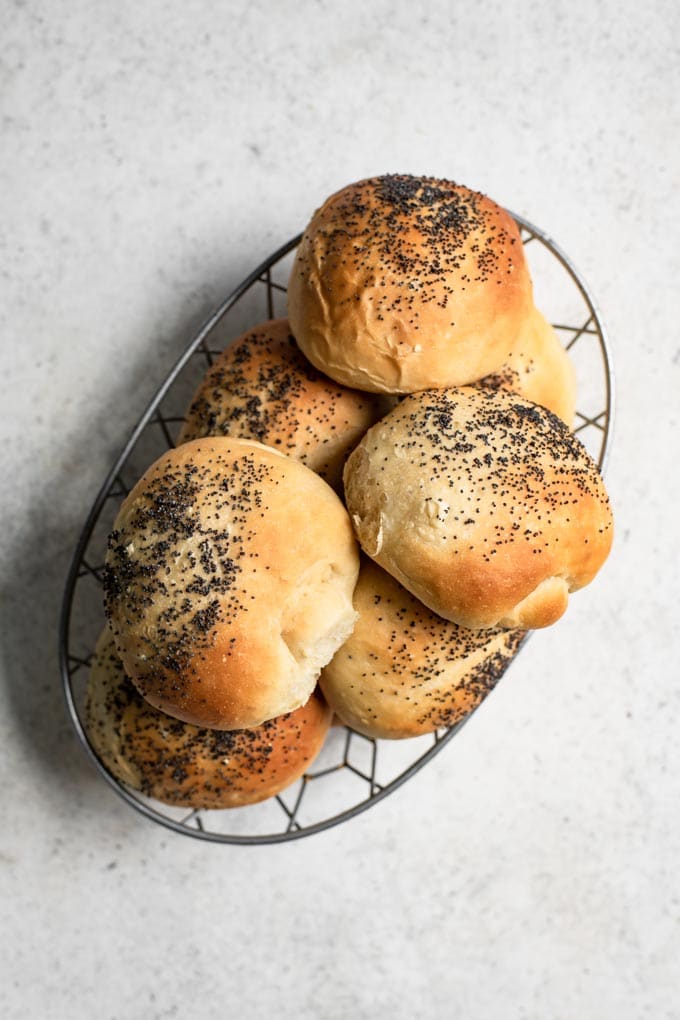
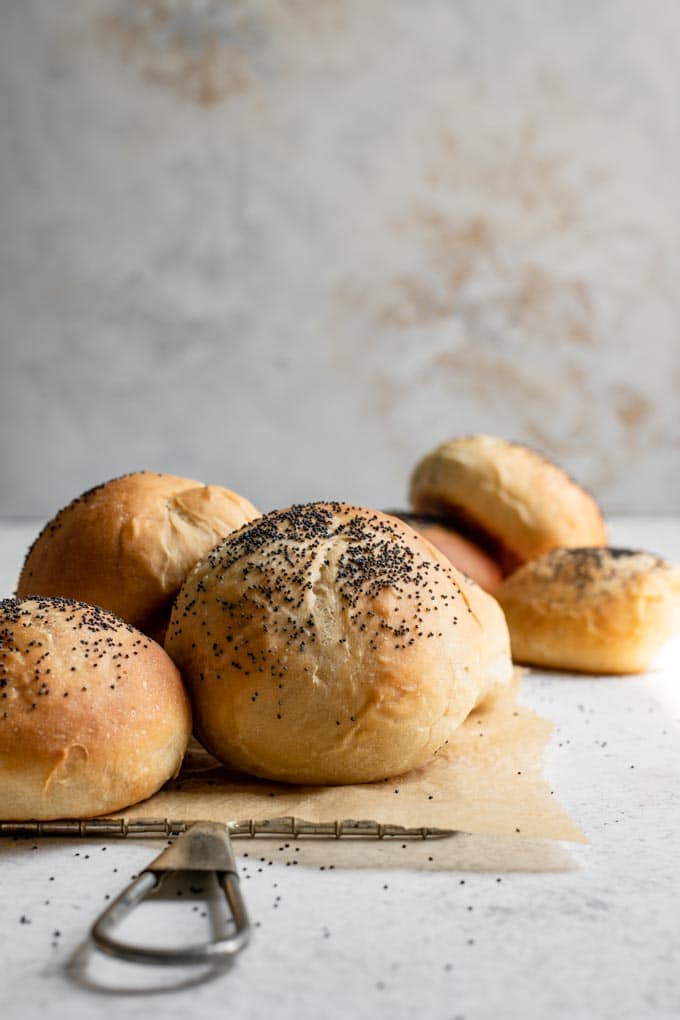
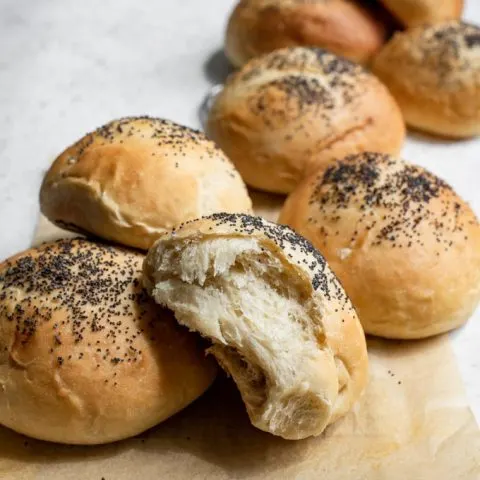
These pillowy soft vegan milk bread buns use the Japanese method of tangzhong to create the most beautiful rolls. They’re delicious and perfect for serving as dinner rolls or burger buns. You can even shape them into hot dog buns!
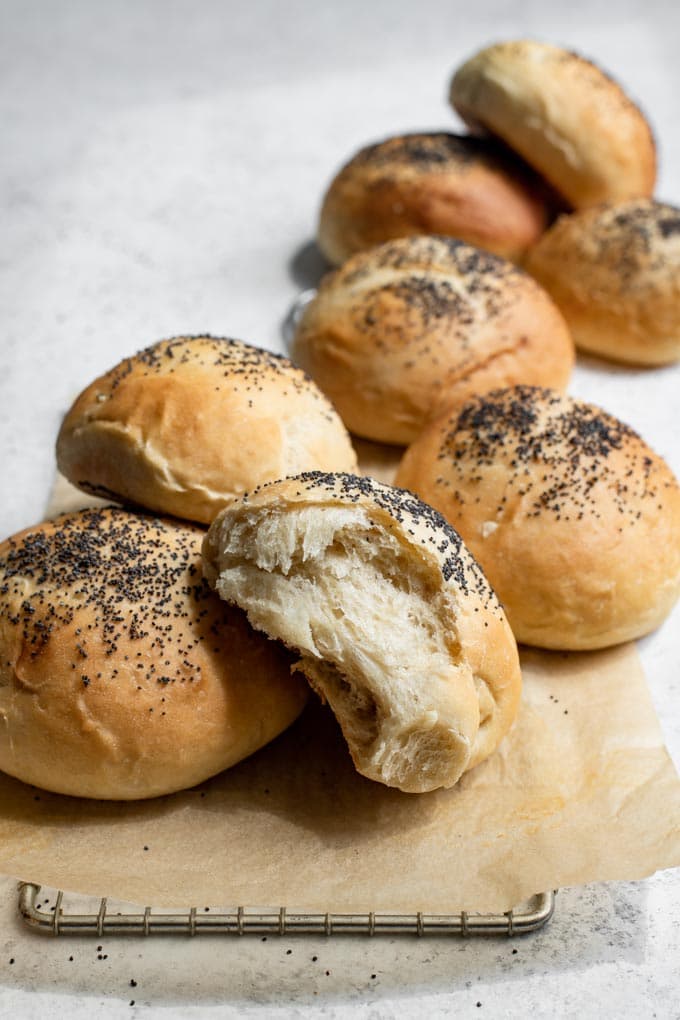

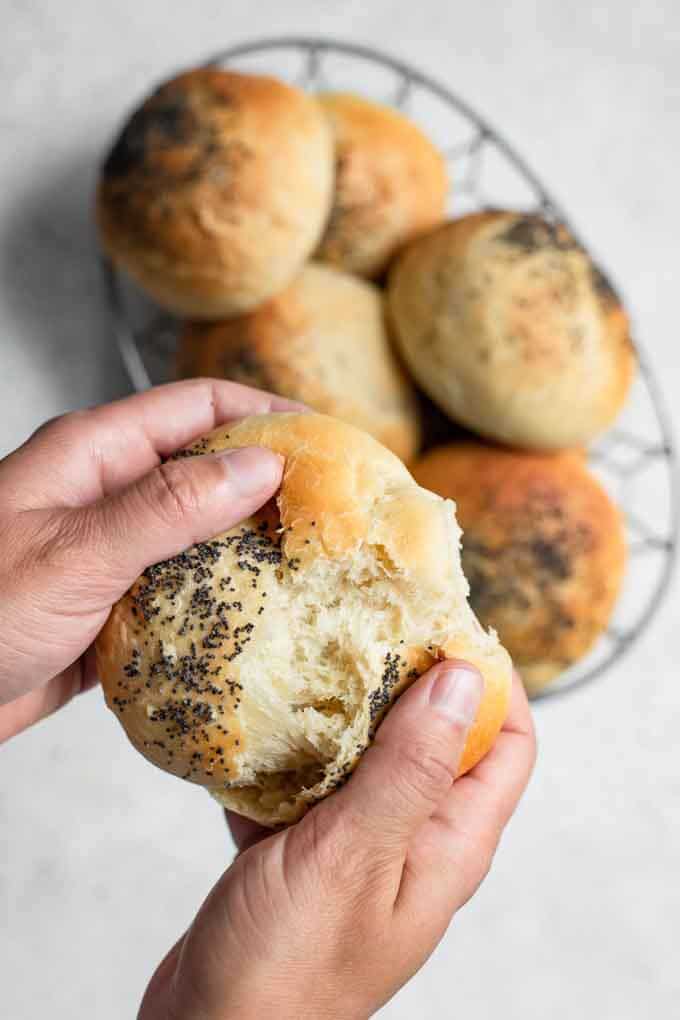
If you have a strong love for soft, squishy bread, you’ve come to the right recipe. These vegan milk bread buns are the most pillowy buns that stay soft and fresh for days!
They’re a delicious dinner roll and make a bomb burger bun! The secret to these buns is in the method, which is a popular Japanese technique called tangzhong.
I’ll go into the details in a moment, but essentially this allows us to use a lot more water in the dough than a traditional bread. This leads to a softer bread, and one that stays fresher for longer.
I still recommend toasting the buns after the first day, but even still you’ll notice a difference in how fresh the bread is!

What is tangzhong?
Tangzhong is a Japanese method of making bread, which involves cooking a portion of the flour and water (or milk) to create a pudding like texture before adding that to the rest of the ingredients.
Cooking the flour pre-gelatinizes the starches (a process that normally happens when bread is baked) and this lets it absorb double the amount of water as un-cooked flour.
Starches are what absorb the moisture when you bake bread, and what leads to soft, tender crumbs. For flour this happens at 124 – 140 ºF, which is above the temperature that kills commercial yeast (recipes typically call for the temperature to be 110 ºF or below).

But cooking a portion of the flour activates those starches and lets you use hydration levels of 75-90%. Most bread roll recipes use closer to 60%.
Hydration refers to the percentage of water to flour by weight, so for 100g of flour, 80g water is an 80% hydration.
We also use bread flour for this recipe, because it is higher in protein and it is able to absorb more water than an all purpose flour. More water = softer bread!
RELATED: Soft whole wheat dinner rolls
RELATED: The Ultimate Homemade Sandwich Rolls
What does it mean to have a higher hydration?
Well, first, because the water is actually absorbed into the flour, when kneading bread 80% hydration bread that incorporated tangzhong it feels like a traditional dough at a lower hydration. This means the dough isn’t particularly wet or sticky, it’s actually quite a beautiful dough to work with!
The bread also has the ability to rise higher as there’s the opportunity for more steam being released and trapped inside the bread as it bakes.
And of course, one of the best side effects: the rolls are extra moist and soft, and stay fresh longer.

How to make bread using tangzhong:
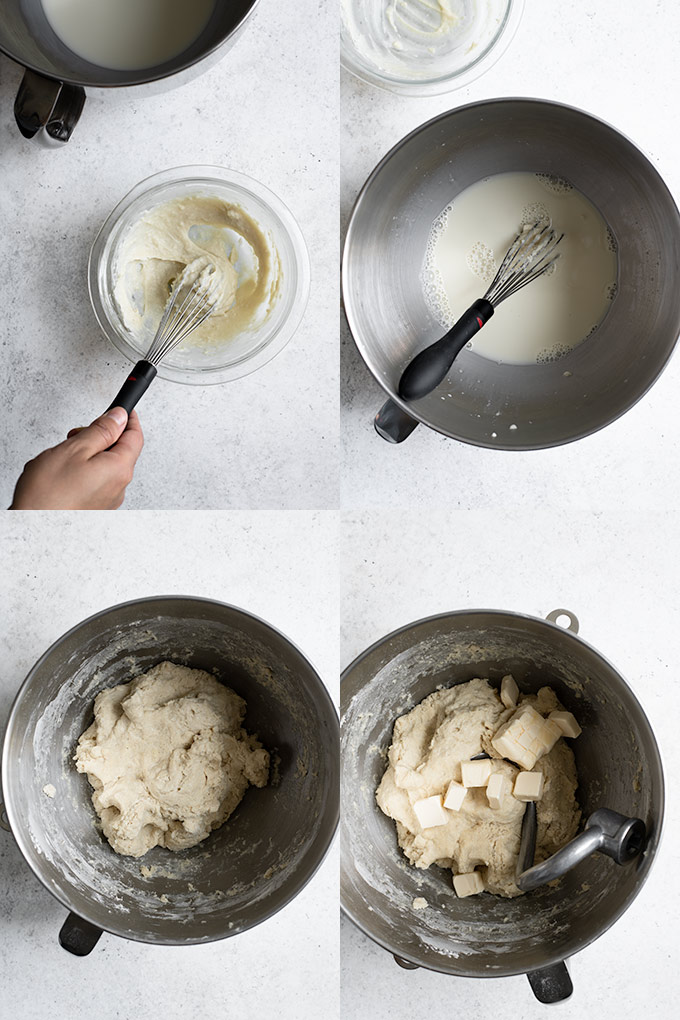
First, we cook the flour and plant milk slurry. We use a 1 part flour : 4 part plant milk by weight mixture and cook it to form a pudding/paste.
To quickly cool it off, mix it right into the milk. This will cool it off to about body temperature (so it will feel very slightly warm, neutral, or even a bit cool to the touch), but as long as it’s under 110 ºF you’re good to go!
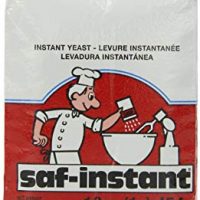
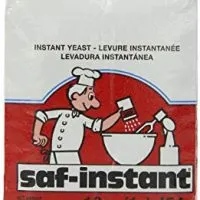
Once we’ve cooled the temperature down, we can add everything else but the flour and softened vegan butter. This includes the yeast. If using active dry yeast we need to let it hydrate, but I love instant yeast because you can add it straight to wet or dry and don’t have to proof or “activate” it before continuing with the recipe.
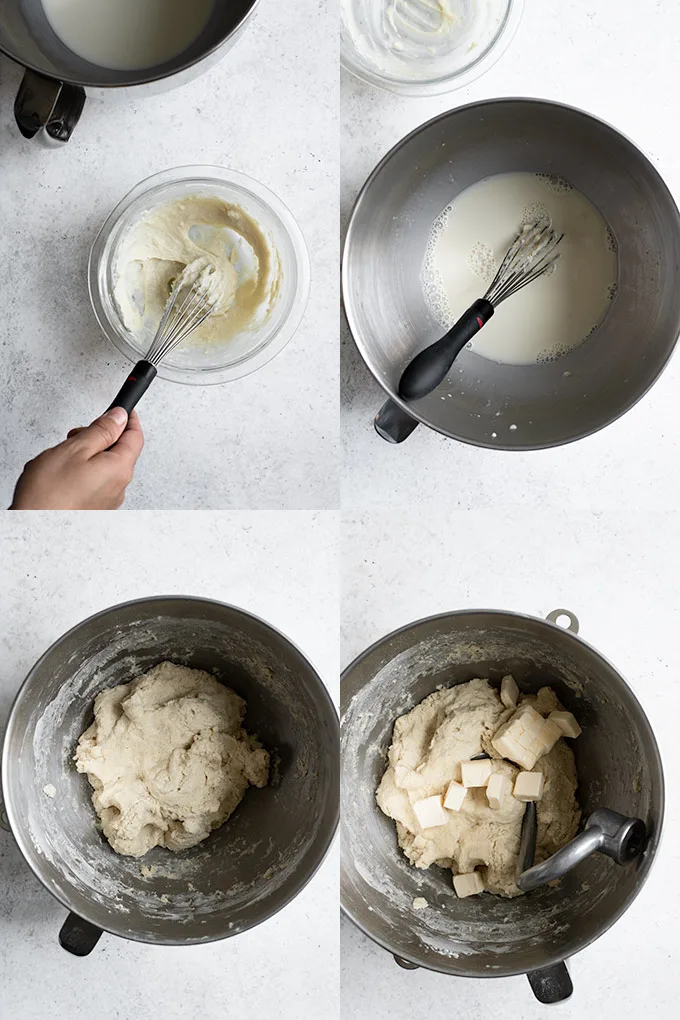
Then add the flour and mix it to create a shaggy dough. We then want to give the flour a chance to absorb some of the liquid we just added so we let the dough rest for about 20-30 minutes.
This step is called the autolyse.
Autolyse happens more slowly when you have salt added to the dough as it is an inhibitor, but this step still gives the flour a chance to absorb the water, which primes the gluten for developing and makes for more effective kneading.
After the autolyse, we add the softened vegan butter and knead the dough for a full 10 minutes. This can happen by hand or bread machine or (my personal favorite) stand mixer.
As it kneads, watch the dough go from a rough ball, to a bit slippery as the fat is incorporated into the dough, to a beautiful supple and soft dough that’s just tacky to the touch.
If kneading by stand mixer or bread machine, give the dough a final minute of kneading on a lightly floured counter to form it into a ball and make any last adjustments with flour to get that perfect soft but not too sticky texture.
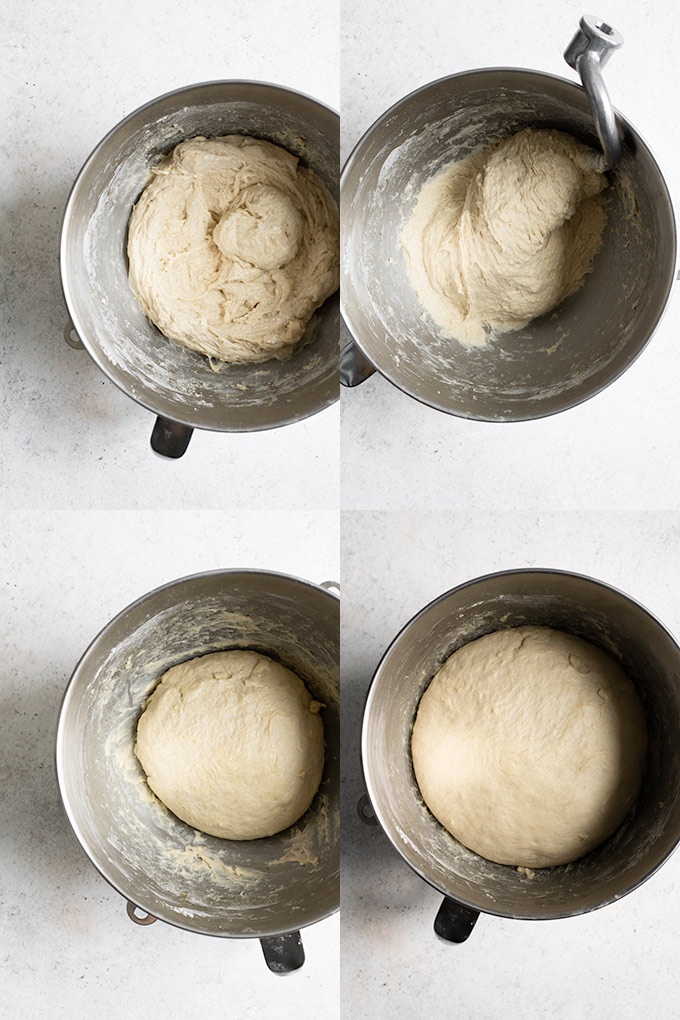
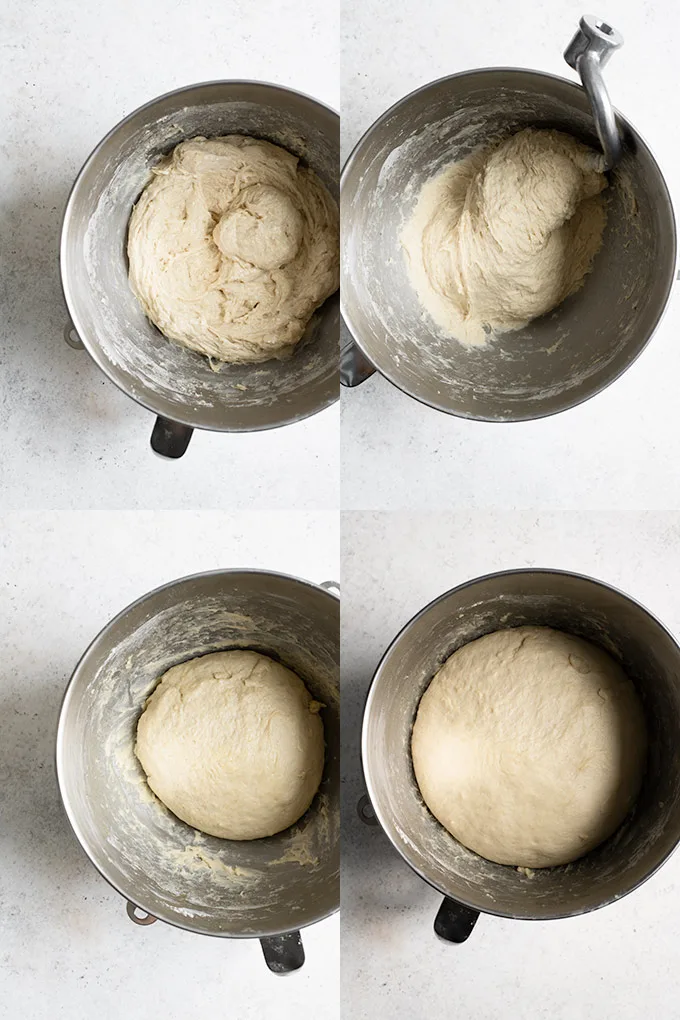
After kneading, we let the dough have its first rise.
Add some oil to a large mixing bowl (or your stand mixer bowl) and turn the ball of dough in the oil. Cover with plastic wrap or a damp towel and let the dough rise for 60-90 minutes or until it is doubled in size. This can happen even faster in a hot and humid (read: summery) kitchen. It can take even longer in a cold, drafty, and dry kitchen environment (like in the winter).
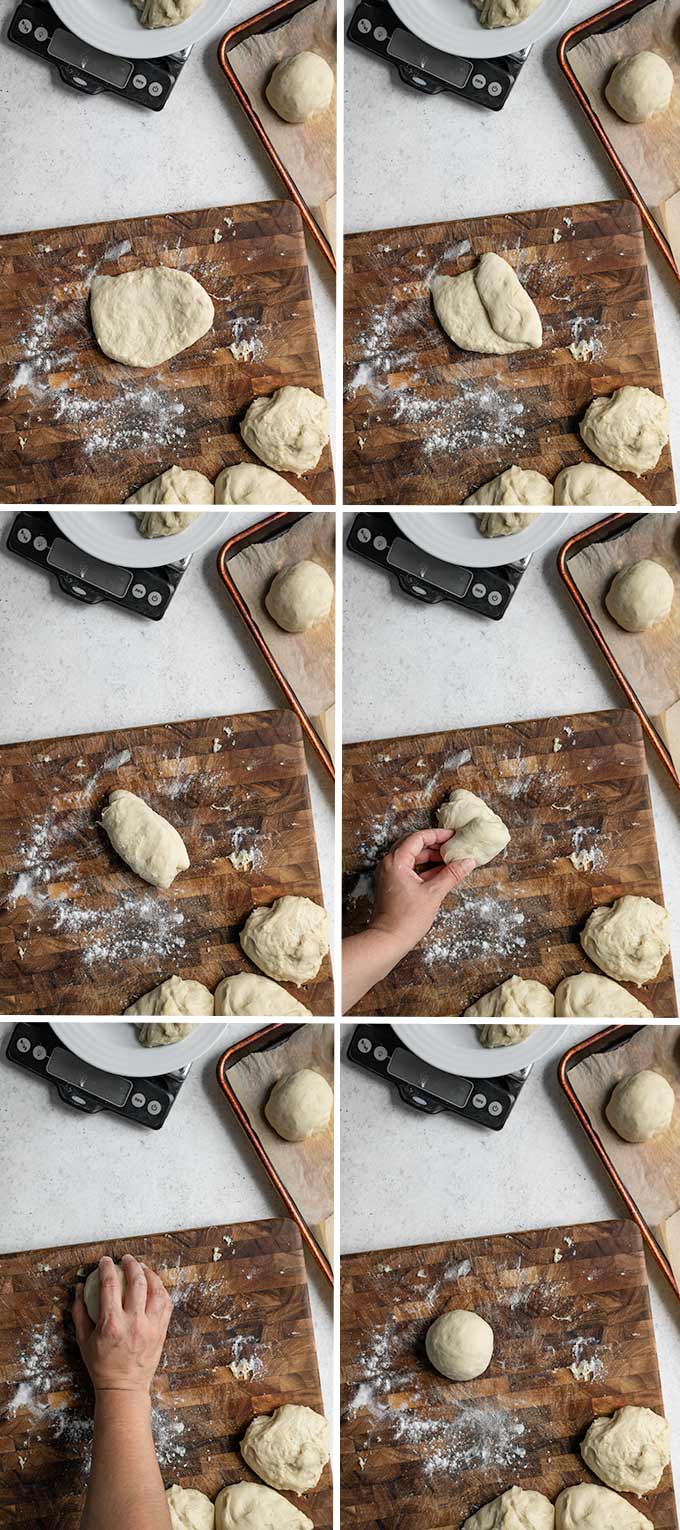
Once doubled, turn the dough onto a counter, only adding flour to prevent sticking if necessary. Divide the dough into 8 pieces if making burger bun sized rolls (you can change this to 12 pieces to make hot dog buns or smaller dinner rolls).
The shaping of the dough is very important to get the optimal final texture.
When the shaping is done properly it leads to tall and structured almost flakey layers. Because I was actually making these milk buns as burger buns I wanted to ensure a rounded finish so did a bit of a hybrid shaping method.
First, press each piece of dough into a rough rectangle shape. Then, fold it into thirds like a letter.
Next, roll the short edge of the dough, making a tight roll. At this point you could place the roll for its second rise, but to make a round bun shape, I very gently roll the dough under my palm to create a round ball shape.
I don’t do this as long as I would for a typical bun shape. Rolling a ball of dough under your cupped palm created a taught skin that holds the structure of the dough and keeps its shape while it rises. Inside of this ball is an unordered gluten structure.
RELATED: Vegan Sweet Potato Rolls
RELATED: Vegan Homemade Pretzel Rolls
With the Japanese milk bread style dough, the shaping of the dough into a rectangle and rolling provides a bit of order to the gluten so it creates tall flakey layers (which also helps it get a taller rise).
So there’s no need to seal the bottom of the roll as you typically would, just give it a few quick circles under your palm to create a general round bun shape.

If you want to make a hot dog shaped bun, skip the final step of shaping the dough into a ball and instead roll the dough under your palms until it is 5-6″ long. Then proceed the same way.
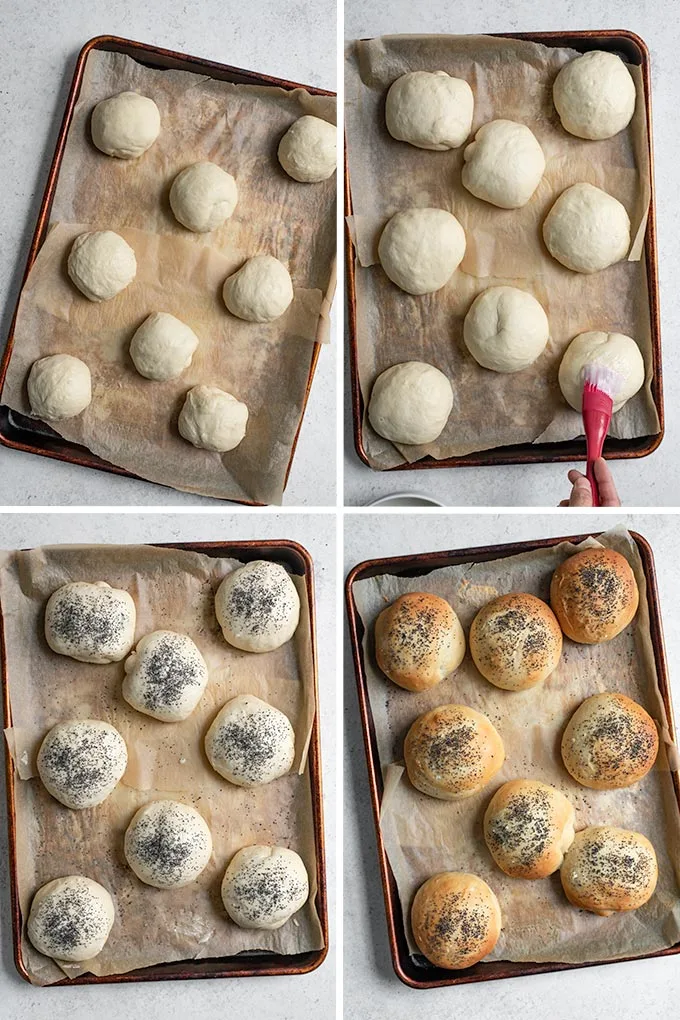
Place the shaped dough on a parchment lined baking tray, leaving a few inches between each bun. Cover these with plastic wrap and let them rise for another 30-40 minutes until puffy. Again, this may take more or less time depending on the environment in your kitchen.
The last significant difference with this bread is the temperature it bakes at.
Japanese milk bread is baked at 350 ºF. This differs from the method of making hot and steamy oven environments for crusty style loaves. This in part is because the bread is typically made with eggs which you apparently don’t want to get too hot (not an egg expert here, sorry). But its also the appropriate temperature to make my vegan milk bread buns!
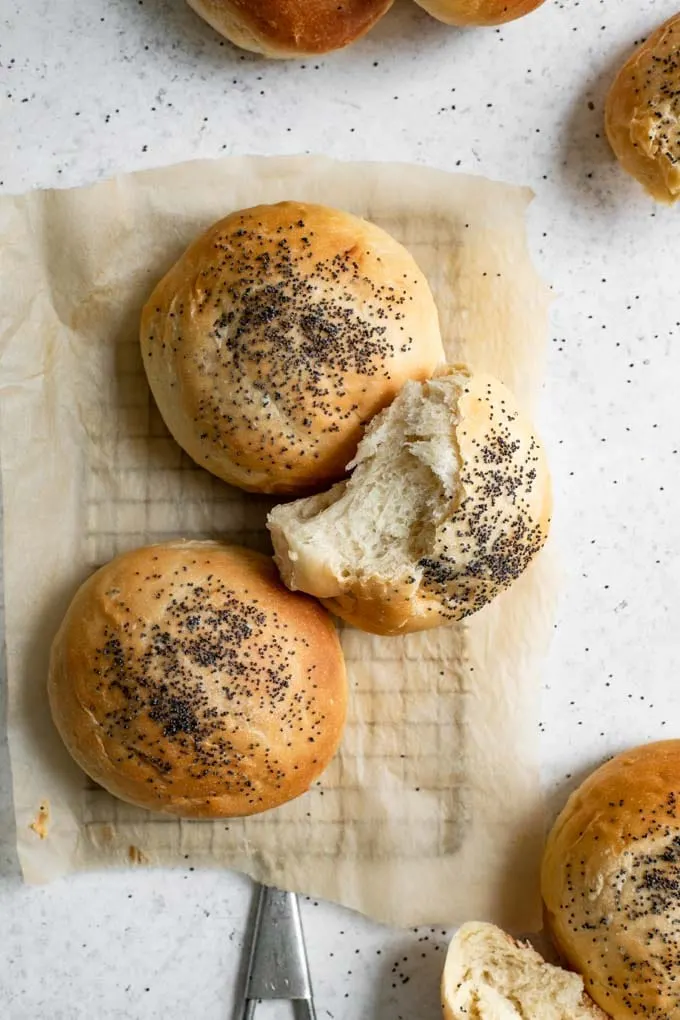
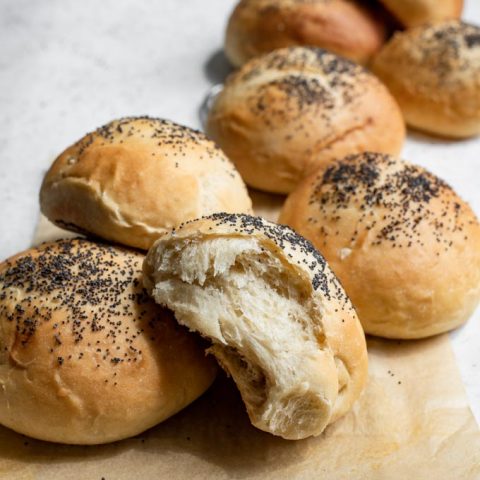
The buns take about 30 minutes to bake, and when they come out they are just the most delicious, squishy, soft, beautiful buns there are!

I’ve had tangzhong on my brain for awhile.
I’ve been forever curious about the science behind it and the beautiful results. Recently my friend Constanze from seitan is my motor has been experimenting a lot with milk bread and sharing her results on her instagram.
The beautiful loaves she shared were so tempting, and thankfully she’s posted her own recipe for vegan milk bread which I plan on trying soon!
But it’s [veggie] burger season right now and I felt a need for soft, squishy, homemade buns for my burgers, and ended up adapting my favorite homemade pretzel buns to make them into milk bread.
It meant increasing the hydration by a lot, using the tangzhong method, switching from oil to vegan butter (I imagine you could use refined coconut oil but I haven’t tested that yet).
A few last notes about ingredient choices:
Milk bread is an enriched dough. Traditionally this means adding milk, butter, and eggs to the dough.
The milk is easy to substitute, and I use a vegan plant milk. Use a store bought soy or oat milk for best results. The natural fats, lecithins (in soy), and starches in these milks will support the bread.
For the butter, this is also easy as I use a vegan butter.
When it comes to substituting the egg, there are a lot of different ways you can go about this. We don’t really need the egg for structure as the gluten provides plenty of that. The egg is also not for fat, because we’re adding [vegan] butter.
In the case of this bread, the egg adds lecithins which helps improve the shelf life of the bread. It also does add some tenderizing of the dough to create a softer dough.

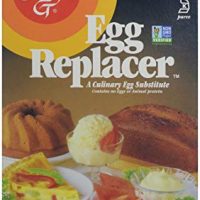
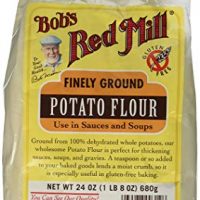
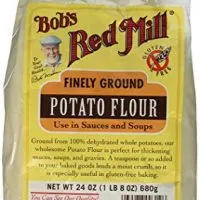
So for replacing the egg in this recipe use either Ener-G Egg Replacer (affiliate link) or potato flour or starch (as this is the main ingredient in Ener-G, and it works well). Because we’re adding starch to the dough, we can add even more liquid as it will help the bread absorb even more water.
I also use either potato flour/starch or Ener-G to make an “egg wash” of sorts. It doesn’t turn shiny like egg when cooked but it does help the poppyseeds stick really well to the bun. This step is optional.
Alright, that should be all the info you need (and well probably quite a bit more) to tackle Japanese milk bread!
Make it and you’ll fall in love with the squishy, tender, almost flakey layered beautiful bread. It’s a really cool technique with fantastic results!
If you make these vegan milk bread buns, leave a comment below and rate the recipe on the recipe card. And please share your photos with me on Instagram, tag @thecuriouschickpea and #thecuriouschickpea. I love seeing your recreations!
WANT MORE DELICIOUS VEGAN RECIPES?
SIGN UP FOR MY EMAIL NEWSLETTER & FOLLOW ME ON INSTAGRAM, FACEBOOK, AND PINTEREST!
Vegan Milk Bread Buns
These pillowy soft vegan milk bread buns use the Japanese method of tangzhong to create the most beautiful and delicious rolls. These soft and tender rolls make great dinner rolls or burger buns. You can even shape them into hot dog buns!
Ingredients
Tangzhong Starter
- 28g (3 tbsp) bread flour
- 113g (1/2 cup) plant milk
Bread Dough
- 285g (1 1/4 cup) plant milk, cold or room temperature
- 56g (1/4 cup) water, warm (95-110 ºF)
- 28g (2 tbsp ) sugar
- 8g (1 1/2 tsp) salt
- 12g (1 tbsp) potato flour/starch or Ener-G Egg Replacer
- 9g (1 tbsp) instant yeast
- 475g (4 cups) bread flour
- 56g (1/4 cup) vegan butter, softened to room temperature
"Egg wash" (optional)
- 2 tsp Ener-G Egg Replacer or potato flour/starch
- 1/4 cup plant milk
- poppy seeds
Instructions
- Mix together the ingredients for the tangzhong, 28g (3 tbsp) flour and 113g (1/2 cup) plant milk. Heat in a pot on the stove, whisking, until it thickens to a paste. Or microwave in increments of 20-30 seconds, whisking between each one, until it thickens to a paste.
- In a large mixing bowl (or bowl for the stand mixer) combine the cooked paste and the rest of the plant milk. Stir to distribute and check the temperature. It should feel lukewarm and be under 110 ºF, otherwise let it cool to this point.
- Add the water, sugar, salt, potato flour or Ener-G Egg Replacer, and instant yeast and whisk to dissolve. If using active dry yeast let it sit for about 10 minutes until it gets a little foamy.
- Add the bread flour and mix with a wooden spoon or your clean, wet hand to form a shaggy dough. Let sit and autolyse for 20-30 minutes.
- Add the softened vegan butter to the dough. Knead the dough in a stand mixer, bread machine, or by hand (adding flour to the counter as necessary to prevent sticking) for 10 minutes. The dough will first incorporate the vegan butter, then turn slippery, then the gluten will develop and turn into a supple and soft dough. If kneading by machine, turn the dough out onto a counter and knead for 30-60 seconds to make any last adjustments with flour if needed. Shape into a ball.
- Add some oil to a large mixing bowl or the bowl of the stand mixer and turn the dough in the oil to coat. Cover with plastic wrap or a damp tea towel and let rise for about 60-90 minutes or until double in size.
- Turn the dough onto a counter (lightly floured to prevent sticking if necessary) and divide into 8 pieces (about 122g each). Can also make 12 pieces of about 81g each for smaller rolls or hot dog buns.
- To shape the dough: press into a rectangle, then fold the sides in like an envelope. Flatten the rectangle, then roll the short edge up like a jelly roll. To make a bun shape, cup your hand over the dough and move your hand in a circle to roll the bun into a ball shape. To make a hot dog bun: roll the jelly roll back and forth under your flattened hands to make it 5-6" long. If making a simple bread roll, skip both of these last steps.
- Place the shaped dough onto a parchment lined baking tray, leaving a few inches between each roll. Cover and let rise for 30-40 minutes until about 1 1/2 the size.
- Preheat the oven to 350 ºF about 20 minutes before baking.
- If you wish to stick seeds on your buns, combine 2 tsp of potato flour or Ener-G Egg Replacer in a microwave safe dish and microwave for 30-45 seconds checking and stirring every 10 seconds until thickened. Right before baking the buns, brush them with the starch mixture and then sprinkle with poppy seeds.
- Bake the buns for 25-30 minutes or until they are a pale golden brown. Enjoy fresh the same day, subsequent days warm up in the oven or toast before eating.
Notes
Note: for best results weigh your ingredients. If you measure by volume to correctly measure your flour first whisk the flour to undo any settling. Then scoop in your measuring cup to fill it, then level with the back of a knife. Any other method will likely result in incorrect measurements of your flour.
Use soy milk for best results, oat milk is a close second.
Potato flour is made from whole ground potatoes while the starch is refined, either will work in this recipe.
Recommended Products
As an Amazon Associate and member of other affiliate programs, I earn from qualifying purchases.


Nutrition Information:
Yield: 8 Serving Size: 1Amount Per Serving: Calories: 324Total Fat: 8gSodium: 103mgCarbohydrates: 54gFiber: 2gSugar: 4gProtein: 10g


Anette johnson
Tuesday 2nd of June 2020
Hi! This recipe looks amazing! One question, can I replace potato starch with tapioca or corn starch? Thanks again for the recipe, can’t wait to try it tomorrow!
MJ
Saturday 18th of April 2020
Hi! Looking forward to trying these. When you say small amount of flour and plant milk for the starter, is it equal parts, a tbsp of each, 1/4 cup, etc? Thank you!
Eva Agha
Saturday 18th of April 2020
Before the main ingredients for the bread there are the ingredients for the tangzhong. This is what you mix together, the 3 tbsp flour and 1/2 cup milk. I'll edit the directions to be more clear :)
Callie
Saturday 16th of November 2019
Hi, love this recipe! One quick question: My husband and I have been using the mass for measuring, except we noticed that 9g of yeast seems like an awful lot more than 1 tablespoon. Is that a typo?
Eva Agha
Saturday 16th of November 2019
Hi Callie, it’s correct! If you think about it those little 7g sachets of yeast are a little over 2 tsp and so 9g is 1 tablespoon (equivalent to 3 tsp). I think the most accurate number is 8.5g but most kitchen scales don’t offer such accuracy for small masses.
Lucy
Sunday 21st of July 2019
WOW! These surpassed my wildest expectations. I thought I was happy with the burger bun recipe I had veganized but these are really next level. Thanks to you and Constanze (I didn’t know Seitan is My Motor so thanks for that too—the recipes look great) for making the tangzhong milk bread technique accessible to the vegan world. I’m looking forward to making her bread too. This is very exciting! ?
Lisa
Sunday 9th of June 2019
I only have integral bread flour... Do you think that would work too? And could I omit the egg replacer/starch altogether because I don't have any or if a flax egg would work instead? Thank you
thecuriouschickpea
Tuesday 11th of June 2019
Hi Lisa, I'm not 100% sure what integral bread flour is, is it just whole wheat flour? If so, it should work, whole grain flour is able to absorb more liquid, just like white bread flour. As for the flax egg, I haven't tried it but have heard that flax weighs down the bread and doesn't produce such a high rise. If you have any starch (tapioca, corn starch--aka corn flour, arrowroot, etc.) I would probably try those instead. Otherwise you can try the flax egg, it will still make soft bread!