
Making your own pizza dough is simple with this easy overnight pizza dough! Four ingredients plus time is all you need for the best homemade pizza of your life!

There are hundreds (thousands?) of ways to make pizza dough, but this recipe is a favorite of mine. It has just 4 ingredients, and maybe 5 minutes of hands on time. It needs only 1 minute of kneading and can accommodate a relatively flexible schedule.
The only real downside to making this recipe (and your own pizza dough in general) is that it's not great for instant gratification. If you want to make last minute pizza, you can get dough from grocery stores or some pizza shops.
But if you want the reward of making your own pizza dough, and you want it to taste as good as the crust from a nice pizza place, you should really try this recipe! It's a perfect all purpose type pizza dough. It can be stretched thin and bakes up with a pillowy edge (technical term cornicione).
The method is quite simple, and you'll see some similarities in the technique to my overnight artisan walnut bread (there's a video over there where you can watch some of the techniques I describe in the recipe if you'd like. Specifically the pinching, folding, and shaping techniques).
The recipe is adapted from The Elements of Pizza by Ken Forkish, who, if you've been following me for awhile, you might have noticed I'm a big fan of. I love the more science-y approach he has to baking. There's certainly an art to making your own bread and pizza, and a lot of it is done by feel and experience, but I find it helpful to understand the whys behind it.
The importance of the pizza baking temperature
Professional pizza ovens typically bake pizzas in just 1-3 minutes at 700 to over 1000ºF, while in my home oven it takes a minimum of 6 minutes for a smaller pizza on the hottest setting my oven goes to.
A typical 10-12" pizza takes closer to 8-10 minutes in a well pre-heated oven at 550ºF. Because of this, the best doughs in a professional kitchen are not going to be the best dough in a home kitchen. More water will evaporate while baking at home due to the longer bake time. That's why when you bake your pizzas at 425 ºF (which is what I see in a lot of recipes) for like 20 minutes, you'll get a much stiffer and drier result.
To imitate a professional oven you want your home oven to get as hot as possible. That's usually somewhere between 500 and 550 ºF. You also want to preheat your oven for an hour.
Your oven may say that it's preheated well before an hour is up, but, you need the heat to absorb into the walls of the oven. That way, when you open your oven door to slip in your pizza, you won't lose as much heat.
It doesn't matter if you have a fancy Wolf or Viking oven or if you have an average oven, this is just a matter of heat transfer and it takes time. Luckily, an hour happens to be the time it takes for the pizza dough to come up to room temperature and for the gluten to relax before you shape and top your dough so it really works out nicely.
The ingredients of the dough
As far as the dough itself is concerned, we use a slightly higher hydration (or a wetter) dough than most professional recipes to account for this additional evaporation. This recipe has a 70% hydration, which allows for a softer and doughier crust. The dough also uses a high percentage of salt.
Salt not only provides flavor in the final product, but it also acts to retard the growth of the yeast. And, as I've said before and I'm sure will say again, a slow and cold fermentation leads to a tastier result, as it gives the yeast time to create those delicious flavor molecules as it processes the carbohydrates in the flour.
Speaking of yeast, only a small amount is used to allow for the long and slow fermentation. I tend to use all purpose flour (and the recipe is written as such), but make sure to use a high quality (and higher protein one), like King Arthur Flour or Bob's Red Mill.
I find my bread and pizzas are a lot better when I use these high quality flours. You can use Italian 00 flour instead in this recipe, but I am pretty happy with the way my all purpose flour doughs come out, so don't usually bother to source the more expensive imported flour.
Using a baking stone or baking steel to bake
Lastly, I want to talk about how to bake your pizza. We've already talked temperature, but what you bake on is equally important. For years I used a pizza stone, and that makes pizza way better than using a thin metal pizza baking sheet.
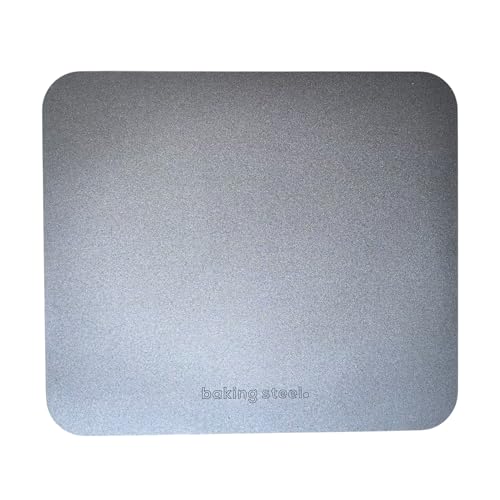
But my pizza stone broke after 7 years and I switched over to a baking steel about 1 year ago and that took my pizza to the next level. Steel is a better conductor of heat than a ceramic pizza stone, so it is able to absorb more heat for a faster bake as well as more evenly for a more evenly baked result. It's a bit of a pricey investment though, and a stone does work very well. Just make sure if you are using a ceramic pizza stone that it is safe to use at least to 550 ºF.
Tips for using a pizza peel
The other tool that's useful for making pizzas is a pizza peel. To successfully use a peel, I've found a few helpful tips (out of a lot of trial and error).
- Dust the peel with flour, then brush the flour around to create a super thin layer over the entire peel. You'll lose a lot of flour but that's ok. The flour works as miniature ball bearings, so for a nice smooth roll you want a single layer of balls, not uneven layering.
- Top your pizza dough while it's on the peel (unless you have great skills to transfer a topped dough, but I don't recommend it unless it's something you already do) BUT don't prepare your pizza until you're just a minute or two away from sticking it in the oven. If you leave the pizza dough on the peel it will absorb that thin layer of flour you just coated the peel with and then stick to the peel.
- Gently shake the peel and watch the pizza slide around the peel before opening the oven.
- If you end up leaving the pizza on the peel too long and it's not able to slide around on the peel, lift the dough up in sections and add a little extra flour underneath, then blow air underneath the dough, essentially resettling the flour into a thin layer. Work in a round until you've loosened the dough from the peel.
- To transfer the pizza to the oven make sure the dough is loose and able to slide from your gentle shaking of the peel. Then open your oven and place the peel towards the back of your pizza steel or stone. Using short back-and-forth jerky movements slide the pizza towards the end of the peel and off of it, moving the peel out of the oven slowly as the pizza comes off of it and onto the steel/stone. Once the pizza is fully off the peel close the oven door and let it bake!
I hope you guys try this dough, and then one of my many pizza recipes! If you have any questions please feel free to ask, or if you try it, let me know how it turns out for you!

If you make this easy overnight pizza dough, leave a comment below and rate the recipe on the recipe card. And please share your photos with me on Instagram, tag @thecuriouschickpea and #thecuriouschickpea. I love seeing your recreations!
WANT MORE DELICIOUS VEGAN RECIPES?
SIGN UP FOR MY EMAIL NEWSLETTER & FOLLOW ME ON INSTAGRAM, FACEBOOK, AND PINTEREST!

Easy Overnight Pizza Dough
An easy overnight pizza dough that requires almost no kneading, is easy to shape, and turns into a perfect pizza. For best results let rest in the fridge for at least 24 hours before using, but it can also be used after 2-3 days. The gluten will continue to relax and the flavor to develop over time.
Ingredients
- 1 ½ cups (350g) water, 95 ºF
- 2 ½ teaspoon (14g) salt
- ¼ teaspoon dried instant yeast
- 4 cups (500g) all purpose flour
Instructions
- Measure out the warm water in a large mixing bowl. Add in the salt and stir to dissolve. Sprinkle the yeast over the water and let sit for a couple of minutes to hydrate and dissolve, then stir to distribute.
- Add the flour into the mixing bowl and stir with a wooden spoon until you form a shaggy dough. Switch to using your hands. Wet your hands to prevent the dough from sticking to them and pinch the dough into several segments between your first finger and thumb. Then reach under the edges of the dough and gently pull it up to stretch the dough until you hit resistance, then fold the section of dough over to rest of the dough. Turn the bowl ¼ turn and repeat the pulling and folding until you've gone all around. This action brings the dough back into one piece. Repeat the pinching and folding process for about 1-2 minutes until your dough starts to turn into a cohesive, but sticky ball of dough. Re-wet your hands as necessary to prevent the dough from sticking to them. Cover the bowl and let rest for 20 minutes.
- After the 20 minutes of rest, turn the dough onto a clean and floured surface. Knead the dough for about 1 minute until you get a smooth ball of dough. Flour your hands and add flour to the counter as necessary to prevent sticking. Lightly coat the mixing bowl with oil and place the ball of dough mixing bowl, turning to coat in oil before leaving seam side down. Cover the mixing bowl and let the dough rise for about 1 hour, until it's doubled in size. You can let it rise for up to 2 hours before shaping.
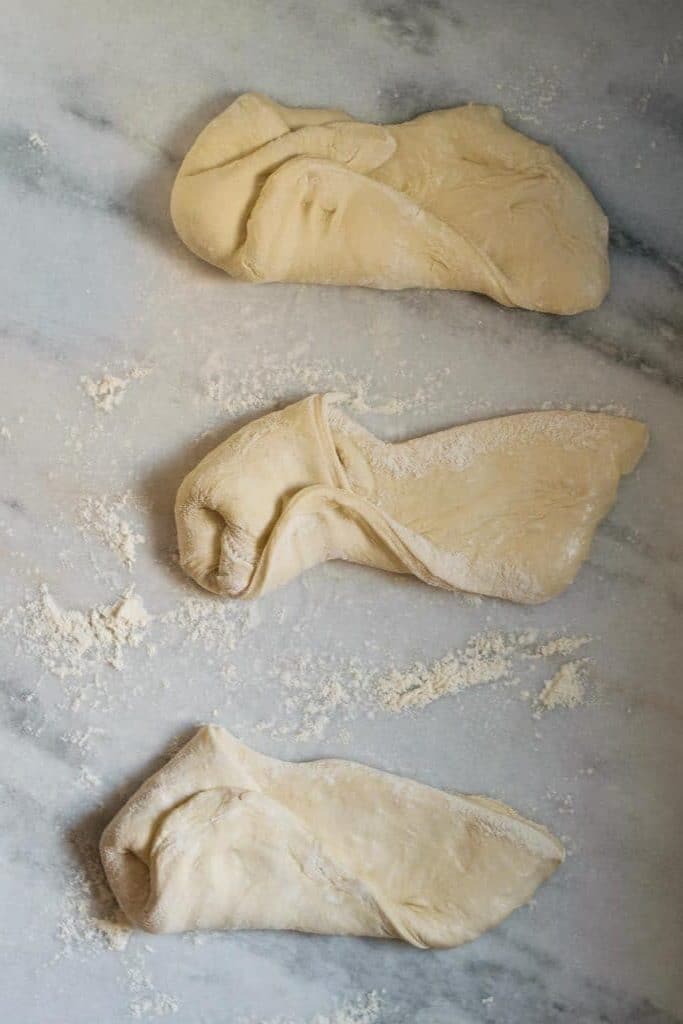
- Turn the dough onto a clean, floured counter and stretch to make a large rectangle. You're going to divide the dough into 2 or 3 pieces (depending on the size you want your final pizza to be) by sprinkling flour over where you're going to cut (this prevents it from sticking) and cut into the sections with a bench scraper, or with a butter knife by pressing straight down into the dough.
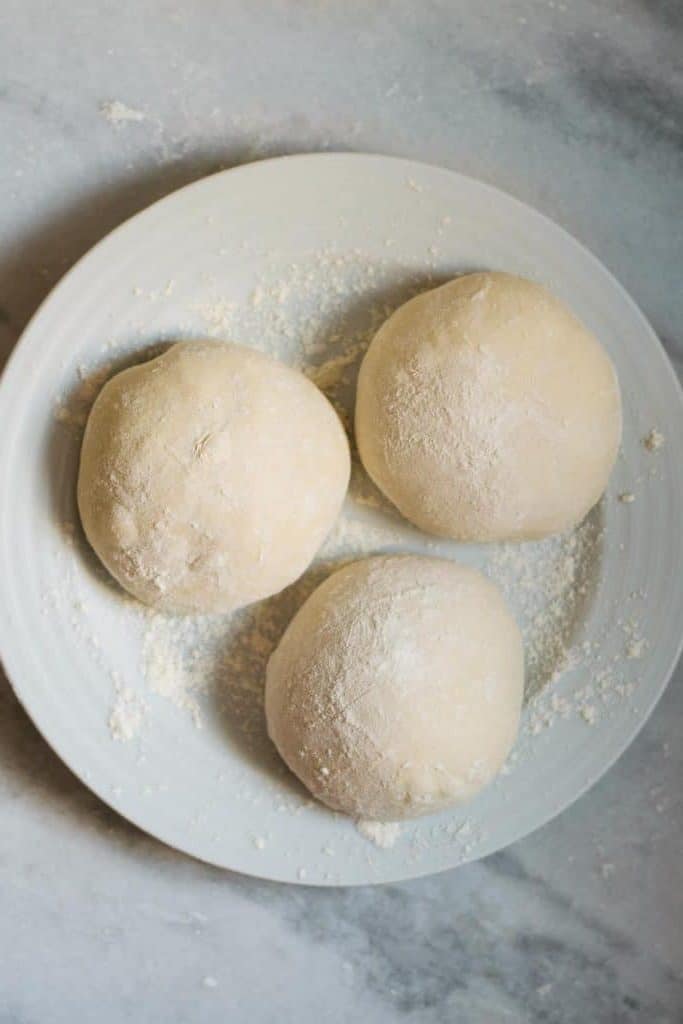
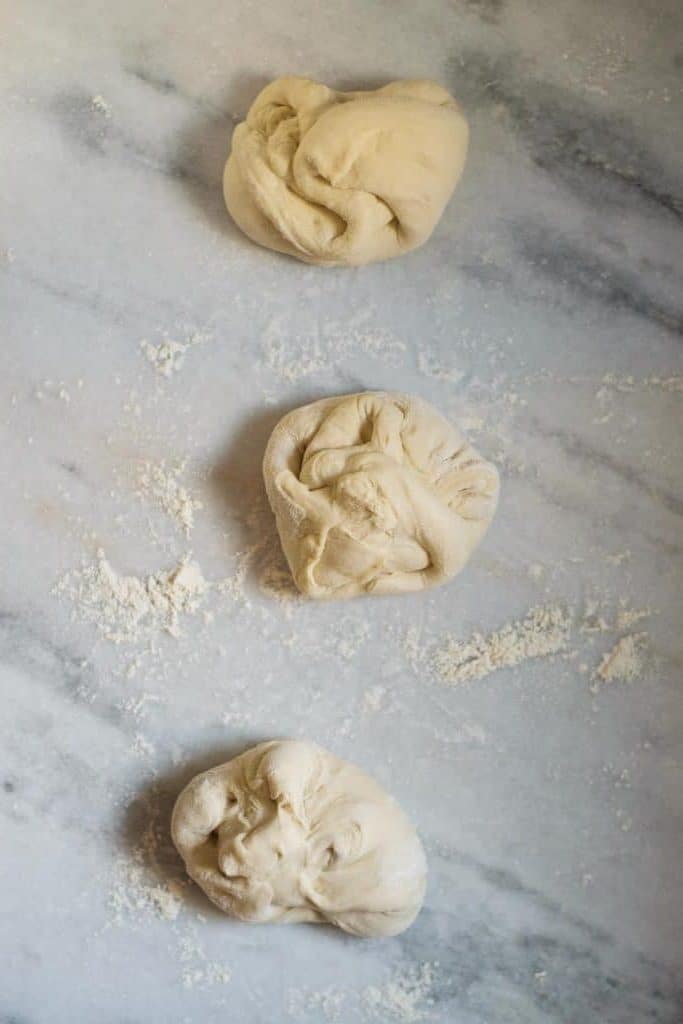
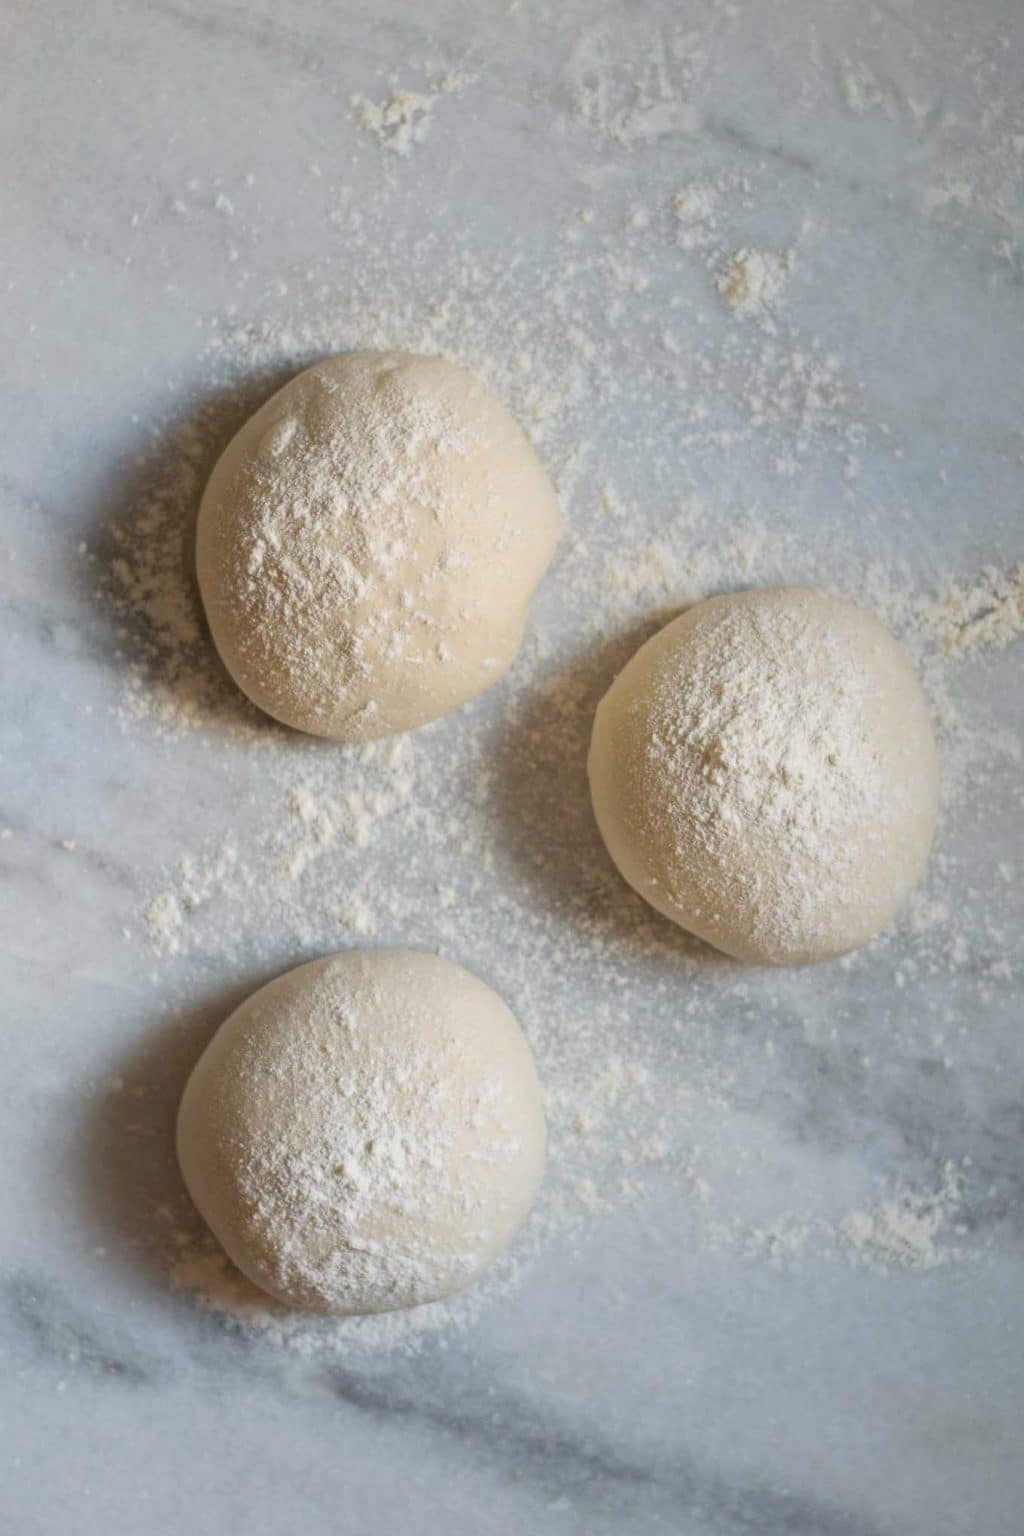
- Shape the dough one piece at a time. To shape the dough, you will use the same folding technique as before (this time with dry or lightly floured hands). Take a section of the dough and gently stretch it up until you feel resistance, then fold over the middle. Take the next section and repeat, and move around the dough until you have created a tight ball. Then, turn the ball of dough and place seam side down on a clean, un-floured section of the counter. Cup the dough ball between your hands with your pinky fingers resting on the counter behind it. Pull the dough towards you, allowing the friction between the dough and counter to pull the dough underneath itself, and using your pinky fingers to prevent the dough from simply rolling. Turn the dough about a quarter turn and repeat. Do this until you've gone in a full circle and the skin around the dough ball is taught. Sprinkle flour over the dough and spread it around with your hands until the dough is not sticky to touch. Repeat with the remaining sections of dough, then place on a floured plate. Sprinkle more flour on top of the dough, then cover with plastic wrap and place the plate in the fridge for at least 6 hours, or up to 72 hours, before making pizza.
- Before shaping the dough and baking, let come to room temperature and relax for about 1 hour. If you try to shape the dough and it's not stretching out easily or quickly, let it rest for 10 minutes then try again.
Notes
Use in any pizza recipe, including the many pizza recipes I've shared! See some tips for baking pizza in the post.
Recommended Products
As an Amazon Associate and member of other affiliate programs, I earn from qualifying purchases.
Nutrition Information:
Yield: 12 Serving Size: 1Amount Per Serving: Calories: 152Total Fat: 0gSodium: 1mgCarbohydrates: 32gFiber: 1gSugar: 0gProtein: 4g
Nutrition is calculated automatically so should be used as an estimate.


... have you ever used active sourdough starter in this pizza dough and can I use bread flower I also have double zero from Italy that's actually made for pizza have a great night..!!?????
You can absolutely use 00 flour! And I have used sourdough starter in similar pizza dough. Sourdough starters can have different hydration and then how much you use affects your dough hydration, but if you’re comfortable working with dough you can definitely play around with it!
..FLOUR...LOL?
1/4 tsp of instant yeast? Seems very low. No sugar?
Hi John, yes just 1/4 tsp of yeast. This dough has a long and slow rise which is why I use such a small amount of yeast. This leads to a better flavor in the final dough. And no sugar is necessary! The flour is enough for the yeast to proliferate.
I rarely review recipes, but I made this on Tuesday night, so that Wednesday evening I'd have a simple meal ready to go. I loved this crust, and mind you I did not follow the recipe perfectly, nor did I have the peel nor the stone. I just used a square small baking sheet, oiled it up, topped it and baked it. The crust was nicely crisped, with lovely coloring and such a nice flavor. I've made a lot of pizza dough recipes, but this one worked great with the limitations I had. AND THANK YOU for posting grams. I much prefer to make dough by weight instead of volume.
Also can I just mention how much I love pizza for using up the scraps? I had a cup of homemade spaghetti sauce left, which turned into pizza sauce. Some leftover shredded chicken, from the stock I had made for chicken noodle soup. And some languishing spinach in my fridge. One pizza was turned into bbq chicken + pineapple pizza. The other was spinach and anchovy.
Hi Candace, I'm so glad you enjoyed the pizza dough! I sometimes don't divide the dough and instead use all of it to make one big pan pizza (using a half sheet pan) instead. And I agree, I love using things up on pizza 🙂 . I appreciate you taking the time to leave a comment, thank you!
Great recipe? Have you tried using bread flour?
Hi Hassan, I have made pizza dough with bread flour before as well as 00 flour. Both turn out with slightly different results (also good, just different). Bread flour absorbs more water (thanks to the higher protein content), so you will have a stiffer dough. You may want to sprinkle on just a bit more water to compensate, but that just depends on what result you are looking for! Pizza dough made with bread flour is more chewy.
All I have on hand is rapid rise yeast. Could I lower the amount of yeast, let’s say 1/8 Tsp. Of rapids rise since that’s all I have on hand for this recipe. I can’t get my hands a regular yeast. they are sold out everywhere because of covid-19 lockdown. Thank you, stay safe and god bless!!
Hi Tony, I actually use instant yeast (specifically I have SAF instant yeast) in my recipe which I believe may be the same thing as your rapid rise yeast. I think the "regular" yeast you're referring to is active dry, which doesn't behave exactly the same as instant yeast. So check the label on the yeast you have but likely you can use it the same way as I do in my recipe.
@Eva Agha, I believe the only difference between instant and active yeast is that instant yeast has smaller granules with some yeast activator. This allows you to add it directly to the dough. If you follow the directions on your active yeast (add to water and wait) then you should get the same result as if you had used instant yeast.
@Tony,
Unless you are using a brick yeast, rapid rise is perfectly fine. The difference is you just do not need to proof it first.
We do pizza every Friday so I can't wait to try this out! It looks so easy!
Hi! Can you freeze the dough if you dont use it all?
Hi Jeremy, you can freeze extra dough, just let it defrost in the fridge before use. The dough also can be used for 3-5 days after making it if left in the refrigerator. After 3 days it will need to be re-shaped into a dough ball to reinvigorate the gluten. You'll need to let it relax for at least an hour if not two at room temperature before making pizza, or stick it back in the fridge until another day. After day 5 it would make some great focaccia!
Just to confirm, do you freeze it after letting it sit in the fridge overnight, or before that?
Freeze after shaping into balls, then defrost overnight (or a day or two) in the fridge.
@thecuriouschickpea,
Freezing dough happens after the final proofing. When you thaw it out it will be ready to shape and use.
Thanks for the recipe!
I am planning to prepare dough for 10 people, each having their own 10" pizza. Would you recommend tripling the recipe to fit this quantity?
I will also be cooking these over campfire coals in cast iron pans, oiled, and covered with aluminum foil. I was planning to use the high heat of direct contact with the coals and to cook for about 5 minutes. Do you have any insight into how I may best achieve thoroughly cooked dough?
Thanks again!
Hi Taylor, for 10 individual pizzas I would divide each batch of dough into 5 pieces (instead of the 3 written in the recipe) and so would double the recipe. Maybe 2.5x to have some extras just in case or to make the extra dough into breadsticks or focaccia.
So I've never cooked pizza dough in a campfire, but have on the grill as well as in a cast iron in my oven. I'll try to give some tips based on my experience!
For grilled pizza, you'll flip the pizza dough over halfway through and then top the par-cooked dough, because you only have heat from below. Then covering will allow heat to get up and melt your cheese/warm your toppings. I still find this method best with toppings you don't need to super roast the toppings. This might be the most similar to pizza made over a campfire.
However, if you're able to heat up the cast iron before adding the dough (but careful because this would be very hot) and putting a lid or aluminum foil over top could help keep enough heat in to let the top cook without flipping the dough.
I would probably try the latter method first with a single pizza to see if it works as it would be the easiest if you're able to find a safe way to handle the hot cast iron as you add dough and top the pizza, but if that doesn't work use the concept of flipping the dough like grilled pizza to make the pizzas! Hope that helps.
@Taylor Dent,
Cooking pizza with cast iron is epic. When using cast iron you usually want to use a dutch oven, that is have a lid that can absorb heat as well.
my suggestion is to heat the cast iron first and with a peel drop the pizza into the pan so you can use the heat of the pan to do the cooking, and, make it well covered with a lid of some sort, any pan / lid is better than foil and it should work well.
This was wonderful! We made a deep dish and two thins with the recipe. No one knew it was a vegan recipe until I told them. The instructions were easy to follow and the taste was fantastic. Thank you for helping this journey of a new lifestyle (no dairy and no eggs) be one that is easier to do than I thought.
I was planning to make pizza for a party of around 50 freinds and needed to make the dough a day before. Found this recipe and it was perfect. I made *10 the quantity in one batch, which was tough, but made around 15-18 14" pizzas (I lost count) In a steel pizza oven. I didn't separate the dough into individual pizzas before hand because of the quantity, instead I kept it in 2 halfs in large bags with plenty oil, which was fine. The dough was the best I have made and everyone at the party went crazy for it, so much air in the crust. The main plus of this is how good it tastes and that thin or thick crust are both delicious, which is not always th case (with some recipes favouring thin or thick). From now on this will be my go to recipe. Thanks a lot for making the part a success. Wish I could share photos.
That is amazing! I'm so glad you and your guests enjoyed the pizza dough! Thanks for reporting back, must have been an incredible party ?
I’m planning to make a large batch for a party and had few questions. When making a large batch of dough , did you do any additional kneading before bulk fermentation, or just put the dough in fridge? Did you shape the balls the day you make pizzas and use it immediately or did you let it warm up and ferment some more before shaping?
Hi John, when I make a large batch of dough, I use the same method as listed in the recipe. It may take slightly longer to bring the dough together, but I don't spend much longer kneading, maybe 20-30 seconds? Only because there's more dough and my hands can only cover so much at a time.
I shape the dough balls after 1-2 hours bulk fermentation and then put them in the fridge immediately. Before using the dough I let it sit out at room temperature for about an hour.
If I've only done a 1 hour bulk ferment and less than 24-36 hours in the fridge I might take it out a bit earlier--depends on ambient temperature during bulk ferment. But if the dough has had 48 hours in the fridge then I find that's plenty of time and an hour is sufficient for the dough to relax.
I hope that helps and let me know if you have any other specific questions I can answer!
I wish this recipe instructed on the amount of ingredients for just one pizza. I don't want or need multiple doughs.
I agree. I search and search and wish I could find this exact kind of recipe (slow rise/ferment in the fridge) but just want a yield of one pizza. It obviously saves time to make a big batch but I can't get through three pizzas in as many days and I've had rotten luck with freezing and defrosting pizza dough.
Hi Ben, I do list the ingredients for 3 pizzas, but you can divide the recipe in half (easier than dividing in thirds), and make one pizza that's about 12". It's difficult to measure such small amounts when it comes to yeast if you go below 1/2 of the above recipe, and it would be easier to use a different recipe.
Sometimes if I'm not wanting to make 2 or 3 pizzas, I'll use the rest of the dough for breadsticks or foccacia. These can easily be frozen and reheated once baked if freezing the dough isn't something you're up for.
You can also use the dough for up to 7 days after making it. After you reach the third day you should remove the dough from the fridge, reshape it into a ball, then stick it back in the fridge. Do this each day to keep the dough workable and some of my favorite pizzas come from days 3, 4, 5. If baking on day 3, reshape it then let it sit at room temperature for 1-2 hours before trying to shape into a pizza and baking.
I hope this helps. If you're weighing your ingredients (which I highly recommend) then it's even easier to divide the dough into the amounts you want. If dividing into three for a single dough ball, you'll be stuck guessing at the quantity of yeast and I would just use a scant 1/8 tsp for the yeast as it's difficult to measure accurately with such small amounts.
Is there any way to substitute an ingredient for yeast? Don't have any on hand in my pantry.
Unless you have a sourdough starter most pizza/bread doughs will require yeast. This recipe can work with sourdough, and I'm happy to provide guidance on that if needed! Alternatively, you could try to find a yogurt + flour dough recipe or make a quick baking powder leavened flatbread to top with your pizza toppings.
What vegan cheese did you use for this pizza?
I used violife mozzarella in these photos 🙂
Can you use all purpose gluten free flour? I have not perfected a gf pizza . Yet
Hi Pamela, I haven't tried, but I am going to assume that it would not turn out to directly substitute a gluten free all purpose flour in this recipe as it depends on gluten to get the results. I recently saw this GF recipe by my friends at baking steel and it looks good! https://www.bakingsteel.com/blog/gluten-free-pizza?rq=gluten%20free
Your pizza dough looks absolutely perfect. Will have to give this a try.
As someone that is an accomplished pizza-bread maker, I tried the overnight pizza dough recipe to see how it stacked up against my regular dough and was fully underwhelmed. I can only assume the worst, such as that, these amazed at the results of overnight pizza dough makers are the same people that make up the contestants on the Americas Worst Cooks show! I was up for a new and improved dough recipe but this wasn't it. I can do much better with my regular method in a few hours.It had very little to recommend as an improvement, 1 item actually. The dough was pliable and easy to work, but had no flavor to add to the finished pizza! Certainly not worth the added effort. Get a Pizza stone an a oven that will hold 500 degrees, for your best shot at it. An additional issue might be that low expectations!!!
Hi Gary, I'm sorry this dough was not to your liking. It's a simple fact that a yeasted dough + cold ferment in the fridge does develop flavor, but it's fine if your taste preferences are different. I like this dough after 24 hours in the fridge, but will say it continues to develop flavor and is even better after 2-3 days as I've said before. There's also no need to insult both me and other readers with your comment! It's fine if something isn't your favorite, but you don't need to be a jerk!
Gary Hewett's recipe can't be all that great if he's looking for a new and improved dough recipe. I have just popped my dough in the fridge for tomorrow night. Thank you for the recipe,and advice.
Gary,
Your critique is as bad as your parent's failure to raise a kind and intelligent human being. Please kindly return to what ever troll cave you were born in and stay away from us humans, thanks.
Wow, I'm astonished that someone would be so rude!
Wow! What an arrogant jerk you are sir!!!!
Bloody hell!
@Gary Hewett --- Gary is the epitome of a male Karen.
I had great success with this, especially with a steel. I'm making it again, but I still don't quite understand the "shaping the dough" step. I don't know what shape I'm supposed to end up with when storing it for a few days. Am I stretching it then reforming to a ball?
Also do you think you could freeze this?
Hi Matthew, yes you shape it into a ball to store it. I should definitely make a video for this recipe, but in the meantime it's similar to how I shape the bread dough in this video (starting the clip during the shaping process): https://youtu.be/2r2Xx8JU77U?t=813
It should look like the dough balls in the photos in this recipe when you cover it for storage.
And yes you can freeze your dough!
My dough has not risen at all.
Hi Marta, can you give me more information? What part of the recipe are you on, have you made any changes or accidentally forgotten any ingredients? What type of yeast did you use? Have you checked that your yeast is not expired and/or is still active? What does your dough look like? What is the ambient temperature where the dough is rising? I'd love to help you out but need more information to advise!
I found my house was a bit cold for the yeast to rise I think - after 2 hours it hadn't done much. I heated my oven to 105f, turned it off, and stuck my covered bowl in and voila - an hour later I had lots of rise!
Trying my hand at this now, I wish there were more pictures for each step. I make bread a lot, but this is my first time making pizza dough. How much of a rise should I be expecting? For bread it's very visible, but so far I don't see much of anything with my dough. Right now I'm at the 1-2 hour bulk fermentation.
Also, when putting the balls into the fridge, will they stay in balls or kind of flatten out? Will the continue to rise while in the fridge? I'm trying to figure out the best way to do it because I made 3 batches so I will have a total of 6 balls. It seems easier to put them all onto a floured baking sheet rather than 6 plates, but I don't want to do that and then have them all flatten out and lump together.. What are your thoughts? Thanks!
Hi Hannah, if you're seeing some rising action but not the full doubling, I wouldn't worry about it too much. The bulk fermentation at room temperature is slow due to the small amount of yeast. It will continue to rise and also relax in the fridge.
For your second question: a quick overnight rest might not have it spreading too much but after 24 hours it will be pancaking. When I double the recipe I do set them out on a floured quarter sheet pan and cover them on that. It's ok if they run into each other, just cut the dough where it's connected with its neighbor with a bench scraper or a butterknife and you can use it from there!
You can also store the dough in those 2 cup plastic containers that restaurants often use, or wrap up the dough in plastic and put it in a ziplock. The point is just to keep them covered so they don't oxidize and give them a chance to both develop and relax the gluten.
And I do plan on adding a video and more photos to this recipe at some point so thanks for the reminder! Happy to answer any additional questions you may have!
My sourdough starter is having an off day so I tried out this recipe instead! However I used fresh yeast.. hope this doesn't upset the recipe too much.
The dough seems incredibly wet though and I can't stop it sticking all over my hands resulting in dough covered flour bags!
I'm now waiting for an hour for it to rise before shaping it into 3 then leaving in the fridge for dinner tomorrow. I hope it will be a bit more manageable!
Wish me luck! 😀
Hi Rosie! I think fresh yeast should work, though rising times may be different and I can't say for sur
It is a wet dough, and I'm not sure which part of the recipe you were at when you left the comment. So at the beginning for the pinching and folding I actually wet my hands to keep the dough from sticking. Then during the kneading step I lightly flour, but it's only getting kneaded for a minute so it still is getting sticky that's just fine! Just use enough flour to keep it good for that minute, I usually don't have to add that much but of course it's dependent on several factors and no two dough days are ever quite the same.
I hope the pizza turns out for you! Having a wetter dough helps the final pizza stay soft over the longer baking times at the lower temperatures of our home ovens (as compared to professional pizza ovens). Let me know if you have more questions!
I like to use fresh ground flour, do you have any suggestions for variations using fresh ground hard winter wheat? I also live in Colorado so higher hydration in dough is essential, otherwise the water evaporates during the rise and doughs are too dry. Thank you for any tips! I will be making this dough for family pizza dinner for Easter!! The kids all get to top their own pizza.
Hi Bill! So in my experience fresh flour doesn't need as much water as your typical bagged flour, but without knowing more about the mill and flour I can't say exactly how much water you need. If you're comfortable handling dough I would try to make it as written given your higher elevation (I presume). If after the dough has sat for 20 minutes during its autolyse (when you let the dough rest and hydrate after you've added the flour and incorporated everything with the pinching and folding technique), if it's still very sticky, at that point I would add more flour into the dough.
I'm working on editing a video right now for the dough recipe which will hopefully help visualize how the dough should feel and look at each step. I hope to have that posted later today and it should be helpful!